As a student, you always have assignments week in and week out. Therefore, it is crucial to know some basic resources or software that can easily help you with your assignments. As a result, we will walk you through how to create a Google form. With this guide, you will be able to create a Google Form and gather responses for your survey assignments. With its user-friendly interface and powerful features, Google Form is the ultimate tool to streamline and simplify your feedback collection process.
Understanding the importance of Google Forms:
Before we go into the steps, it’s necessary to understand why Google Forms is a fantastic choice for creating questionnaire surveys. Here are a few reasons why:
- Ease of Use: Google Form offers a simple and intuitive interface, making it easy for anyone, regardless of technical expertise, to create surveys quickly.
- Versatility: Google Form provides a broad range of question types, allowing you to gather various types of data, from multiple-choice questions to open-ended responses.
- Collaboration: Google Form enables you to collaborate with your peers or students in real-time by sharing and editing the form together.
- Data Collection and Analysis: Google Form automatically collects responses in a spreadsheet, enabling you to easily analyze and visualize the data.
With these advantages in mind, let’s move on to the step-by-step guide on how to create a Google Form.
Step 1: Accessing Google Form
To get started with your survey using Google Form, follow these simple steps:
- Launch your browser on your computer or mobile device.
- In the address bar, type forms.google.com and hit Enter.
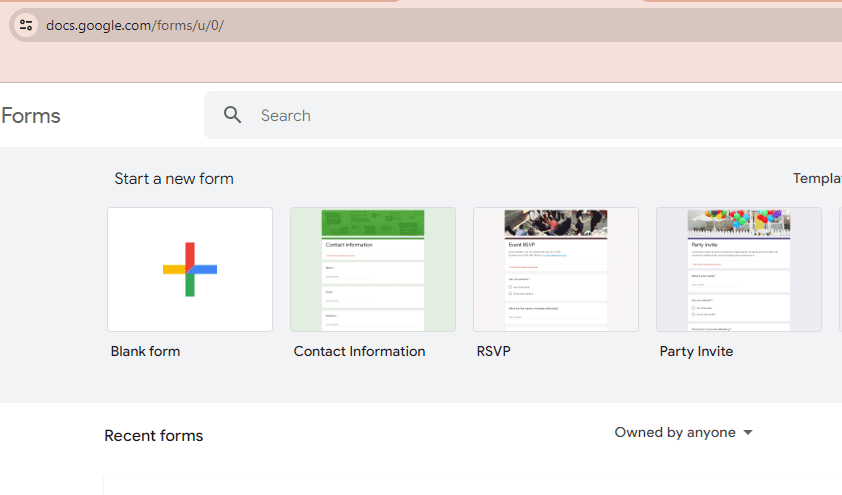
Now that you’re on the Google Forms homepage, you’re ready to create your survey!
Step 2: Creating a New Form
To create a new form on Google Form, follow these steps:
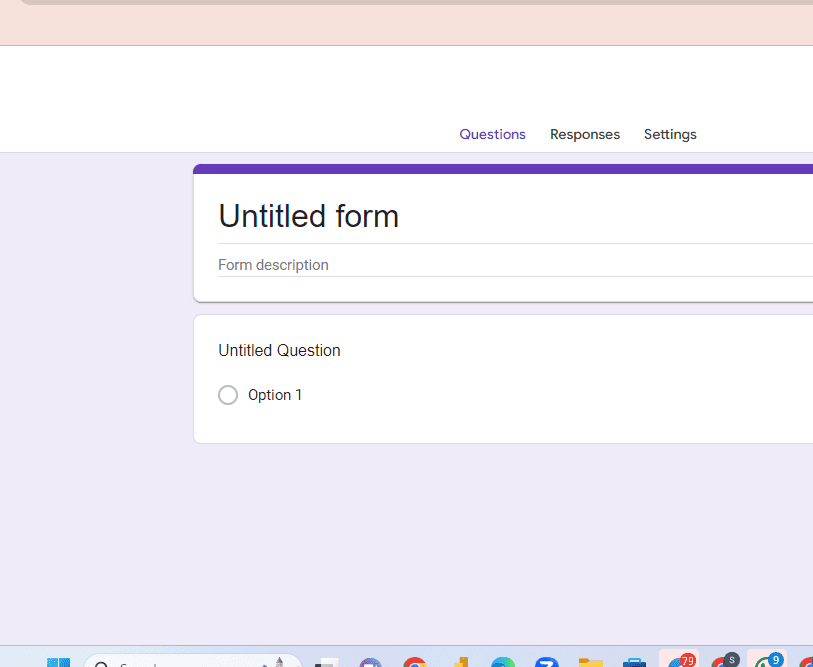
- Click on the blank button in the upper-left corner of the Google Forms homepage.
- A new form, with a default title, will appear. Click on the Untitled Form field to give your form a suitable title.
Step 3: Customizing the Form
Follow these steps to customize your Google form.
- To add a header image to your form, click on the Insert image icon at the top-right corner of the page. Select an image from your computer or choose one from Google’s vast collection.
- If you wish to add a form description or provide instructions for your respondents, click on the Description field below the title. Briefly explain the purpose of the survey and any guidelines or expectations you have for the respondents.
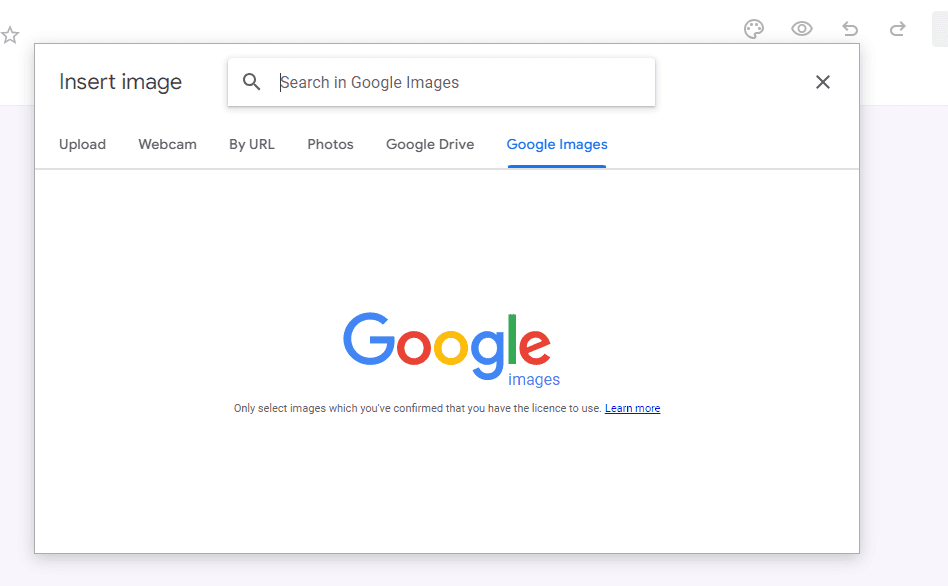
Great job! Your form now has a customized appearance. The next step is to add questions to your assignment survey.
Also see: How to Use Google Scholar: A Guide for Student Researchers
Step 4: Adding Questions to the Form:
The heart of any survey lies in its questions. Follow these steps.
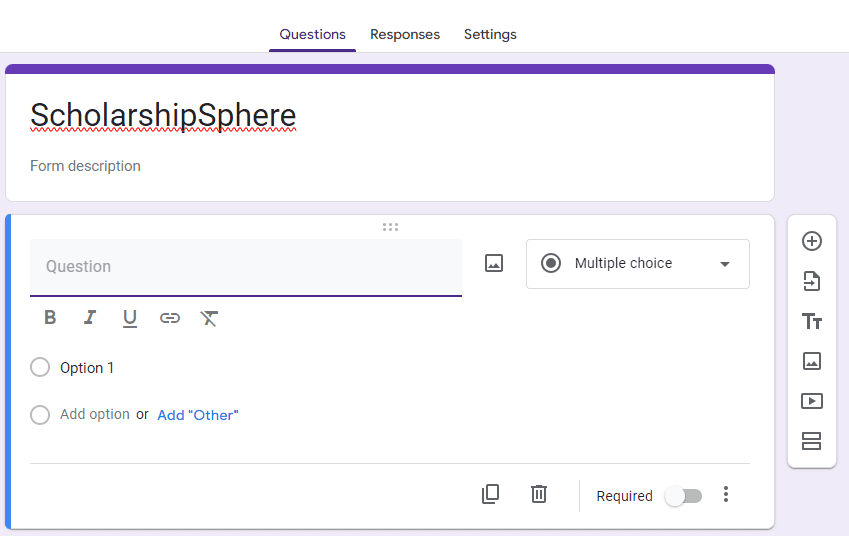
- Click on the + button on the right side of the form to add a new question.
- Choose the desired question type from the list of options, such as multiple-choice, short answer, or dropdown. Each question type serves a specific purpose, so select the one that best suits your survey’s requirements.
- Enter your question in the Question Title field and provide any applicable answer choices or options.
- Repeat steps 1-3 to add more questions to your form. Remember to structure your questions in a logical order to maintain clarity and coherence. To give your assignment survey a professional touch aligned with your branding, follow these steps:
Step 5: Sharing and Collecting Responses
To collect responses and share your assignment questionnaire with your target audience, follow these steps:
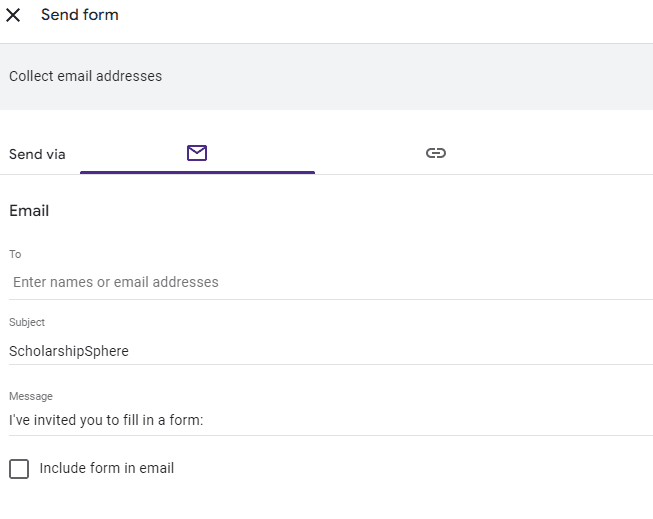
- At the top-right corner of the Google Form page, click on the Send button.
- Choose your preferred method of sharing the survey. You can share the link directly via email, social media, or embed the survey on a website. Google Form offers multiple sharing options.
Takeaway
We are now convinced that you know how to create a Google form. By following the step-by-step guide outlined above, you can easily create a Google Form for a questionnaire survey.

